Building out my home AI Lab for private and local AI
Posted on Do 15 Januar 2026 in personal-ai
So, you wanna do at-home AI? Yes, you do!
There's a bunch of great reasons to run your own AI including having more control over your data and models, learning more about how deep learning works, testing out new ideas without having to pay extra cloud or subscription costs and building out your ability to run AI safely and under your own terms.
In this short post, I'll show you the specs for my two machines, you can find out more about them via my YouTube explainer.
I built out my first machine in 2017 to work on some adversarial machine learning projects and a few paid fine-tuning engagements. But probably more useful to talk about is my second machine, which I built out last year to bring to the Feminist AI LAN party and to tinker with for my own AI projects.
Hardware Rundown
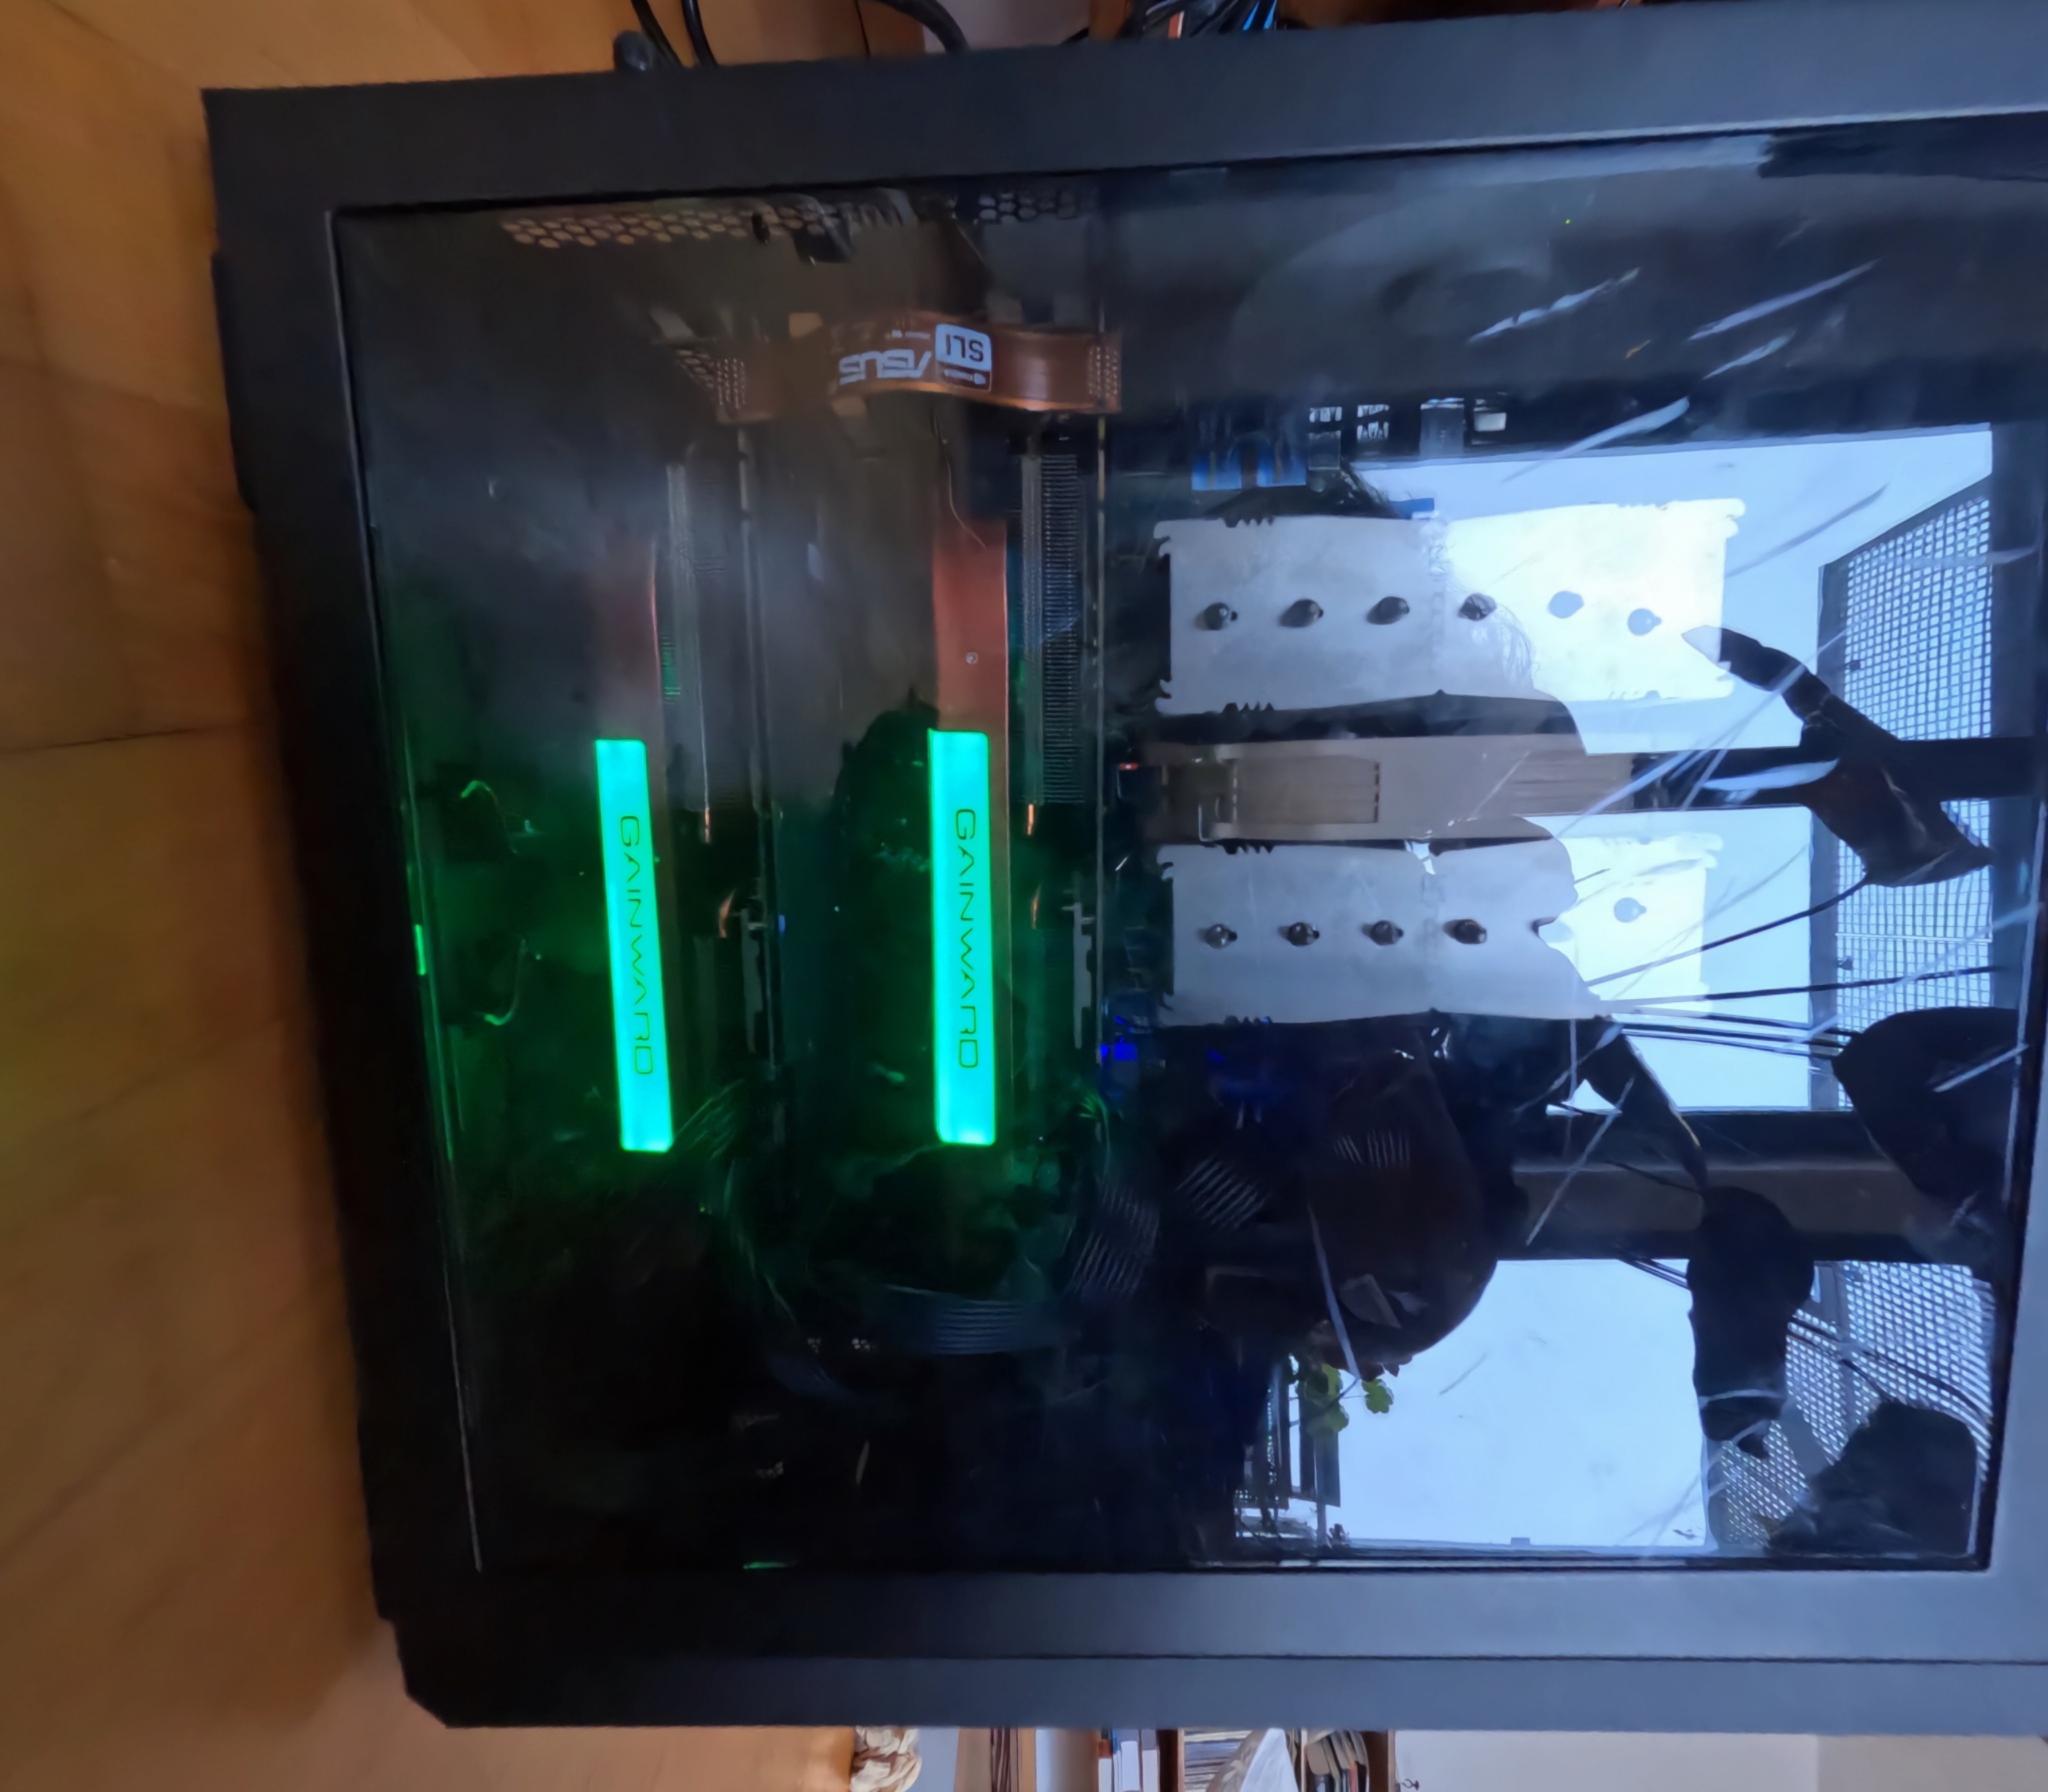
 My very small, very rainbow GPU machine
Here's the full specs of my newest machine:
| Component | Name and Description | Price (in EUR) |
|---|---|---|
| GPU | Gainward GEForce RTX Phantom | 2,999.00 |
| CPU | AMD Ryzen 7 9800X3D CPU, 8 Kernel, 5,2 GHz, AM5 (Granite Ridge) | 538.79 |
| Hard Drive | Samsung 990 PRO Series NVMe SSD, PCIe 4.0 M.2 Type 2280 (4TB) | 328.03 |
| Mainboard | GIGABYTE B850I Aorus Pro, AMD B850 Mainboard | 298.99 |
| RAM | G.Skill Trident Z5 CK DDR5-8200 RAM, CL40, XMP 3.0, CUDIMM - 48 GB Dual-Kit | 260.58 |
| Power Supply | Corsair RMe Series RM1200e 80 PLUS Gold Netzteil | 239.90 |
| Housing | GEJP-011 Jonsplus Z20 Micro-ATX | 94.90 |
| Cooling | Thermalright Peerless Assassin 120 SE A-RGB - 120 mm | 44.90 |
| Shipping | 20.98 | |
| Grand Total | 4826.07 |
So for a total of 4826.07 euros, I have 32 GB of GPU and 48GB of RAM. For me, comparing this to the amount of hassle of getting my datasets to a cloud I trust and getting their GPUs set up with software I like using, this was a worthwhile investment.
If you're just getting started with deep learning and AI, I wouldn't advise getting such a beefy GPU. For a long time, I used the 16GB offered by my old machine for both fine tuning, running small models for inference and general ML/AI/DL tinkering.
I bought these parts from a mixture of vendors including: MediaMarkt, Alternativ, NotebooksBilliger and CaseKing (who were also kind enough to let me drop in and exchange things, thank you!).
I'll be sharing more about how to set up your own LAN party, but in case you're already in the purchasing mood, here's the networking equipment I brought with me:
| Component | Name and Description | Price (in EUR) |
|---|---|---|
| Switch | MikroTik Cloud Router Switch - CRS328-24P-4S+RM | 400.19 |
| USB to Ethernet Connectors | TP-LINK UE300C UE300C USB Type-C to RJ45 Gigabit Ethernet Network Adapter x 10 (18.07 per part) | 180.70 |
| Grand Total | 580.89 |
I got these from MediaMarkt and OMG.de. If you want a smaller switch with less capabilities, that'll do fine especially if you're only connecting one server.
I couldn't find all the specs for my 2017 machine (oops!), but here's what I could find.
 My old but trustworthy GPU machine
| Component | Name and Description | Price (in EUR) |
|---|---|---|
| GPUs | Gainward GeForce GTX 1080 Ti Phoenix GS x 2 (799 per GPU) | 1598.00 |
| RAM | Kingston ValueRAM DIMM 16 GB DDR4-2400 x 8 (90 per unit) | 1463.00 |
| Mainboard | ASUS X99-E WS | 494 |
| Power Supply | Corsair AX1500i 1500 Watt 80+ Titanium Quality | 450 |
| Hard Drive | Intel® 480GB DC S4600 Serie 2.5" SATA, Solid State Drive | 384 |
| Housing | Corsair Carbide Air 540 | 175 |
| CPU | ?? | ?? |
| Cooling | ?? | ?? |
| Incomplete Total | 4564 |
If you're interested, I'll see if I can find the receipts or a price graph and dig around my computer to fill out the above chart.
Then I bought most of the supplies from Amazon and Alternativ.
As you can see, RAM cost a lot more back then (about 11 euros per gigabyte compared to about 5 euros now). That trend should continue. It's a lot harder to time pricing of GPUs mainly because the market is now very unpredictable and there are only a few suppliers.
I'll be testing out a few other GPUs this year and maybe building out a machine live on YouTube, so stay tuned.
Software Tips
If you're new to setting up a computer for AI use, you'll probably have a learning curve for setting up Linux. Just be patient with yourself and take it slow!
If you've already been running linux either at work on servers or on your own machines, there are still some tips if you're new to AI/ML workflows. I'll try to summarize some here and I'd be happy to update with additional feedback.
Look into drivers
Depending on how old or new your GPUs are, you might run into driver issues. This is because the GPU providers sometimes change the chip architecture and the open-source drivers might not yet support it.
This means first looking into what drivers you can use with the GPU you bought. Usually someone has posted about this, so I recommend looking at the GPU specifications page and then searching the internet. If the open-source drivers work, then install those. If only proprietary drivers work, install those.
There will be additional libraries that you need that are usually distributed via your linux OS. For example, in debian/Ubuntu there are several supporting packages for NVIDIA GPUs that are required and often start with nvidia-. Look into specifically which of these work for the drivers that you choose.
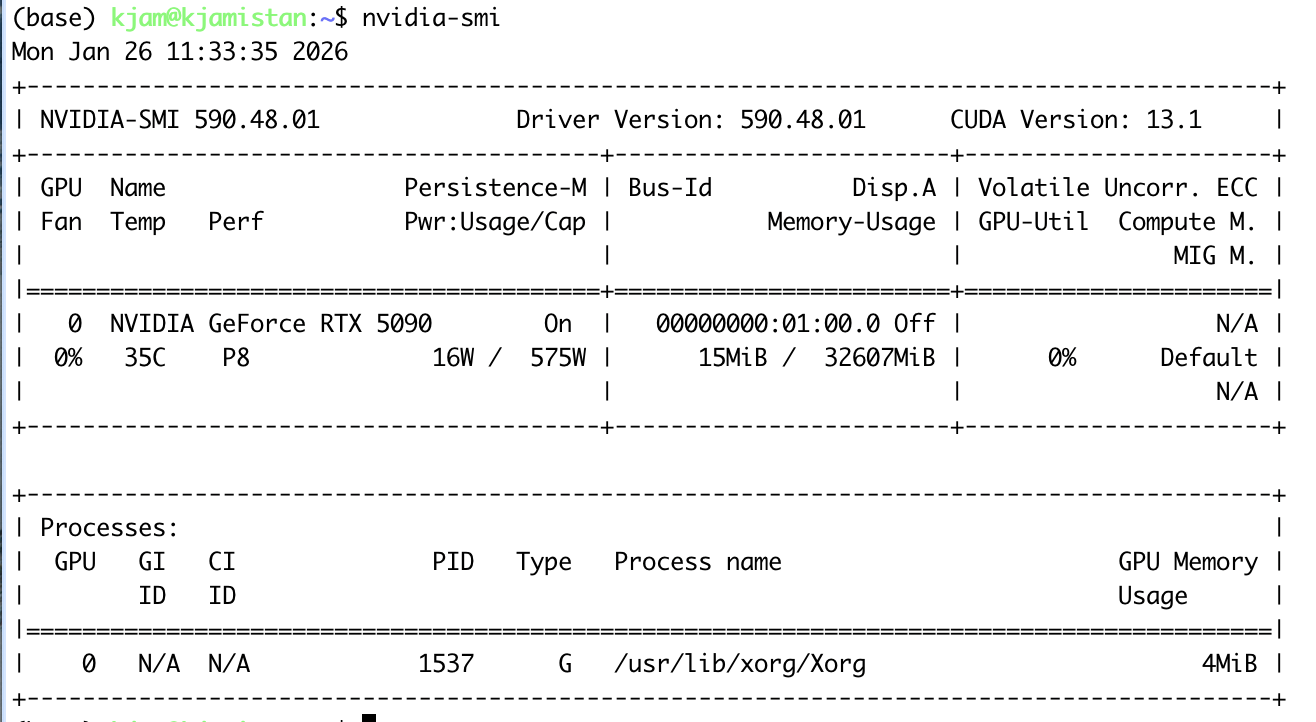
You can usually run a command once the drivers are properly installed to test that the mainboard and operating system can talk to your GPU. First, always reboot so the new drivers load properly. Then, I run nvidia-smi to see that my Ubuntu install can see my chip. There are different commands for AMD GPUs.
Setting up your Python and GPU-software environments
The next thing you'll need to do is set up your Python environments either using something like conda or uv. Many people new to Python prefer uv, so if you haven't done a lot of Python, start there.
In addition, your GPU has specific software that helps the Python libraries run the correct parallelization for your chips. For NVIDIA GPUs this is CUDA. For AMD, you can use several open libraries, like OpenCL, or use ROCm.
You should install this GPU-specific software from the vendors, or make sure that you are looking at what operating system you have and what CPU you have. There will be some of these libraries available via your operating system, so have a look and see if they are updated for your liking.
I usually just install CUDA from the NVIDIA website, so I can always opt for the newest version. This is because some of the Python libraries you want to use might only support newer versions.
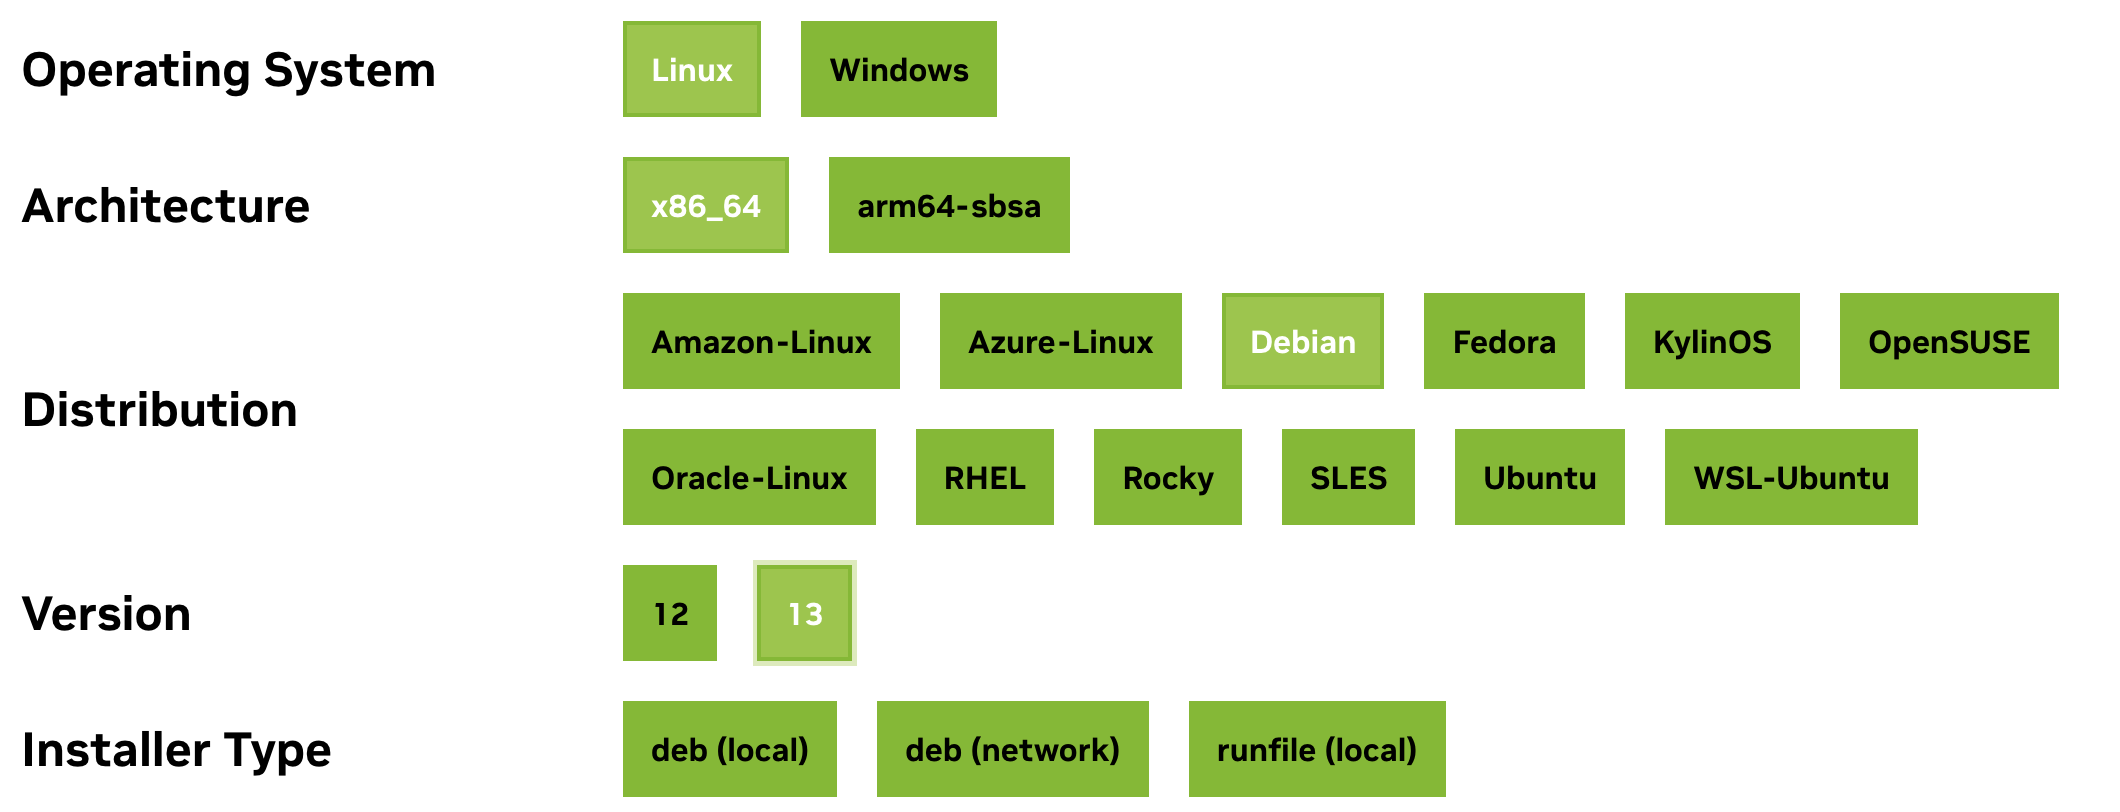 CUDA Installer Example
Once you have the GPU-software and your initial Python environment running, you can get started with AI/ML specific libraries.
Focus on one virtual environment per project or use case
Always use new virtual environments for new projects. Because many of the ML/AI libraries will have underlying dependencies based on Python version, GPU-software version and other Python libraries, this means focusing on the most important library you want to use first.
This means, for your project, making a new virtual environment with a Python version you know is supported by the most important library you want to use for the project. Usually, I start with PyTorch, but you may start with something else, like vLLM or Hugging-Face or some other library you want to choose.
PyTorch has an easy-to-use recommender that helps you decide how to install it based on your operating system and GPU-software. Not all libraries will have something like this, so you might need to do some trial-and-error if you find that it doesn't work on your machine (like trying an earlier version of the library, or searching around to see if anyone has solved it).
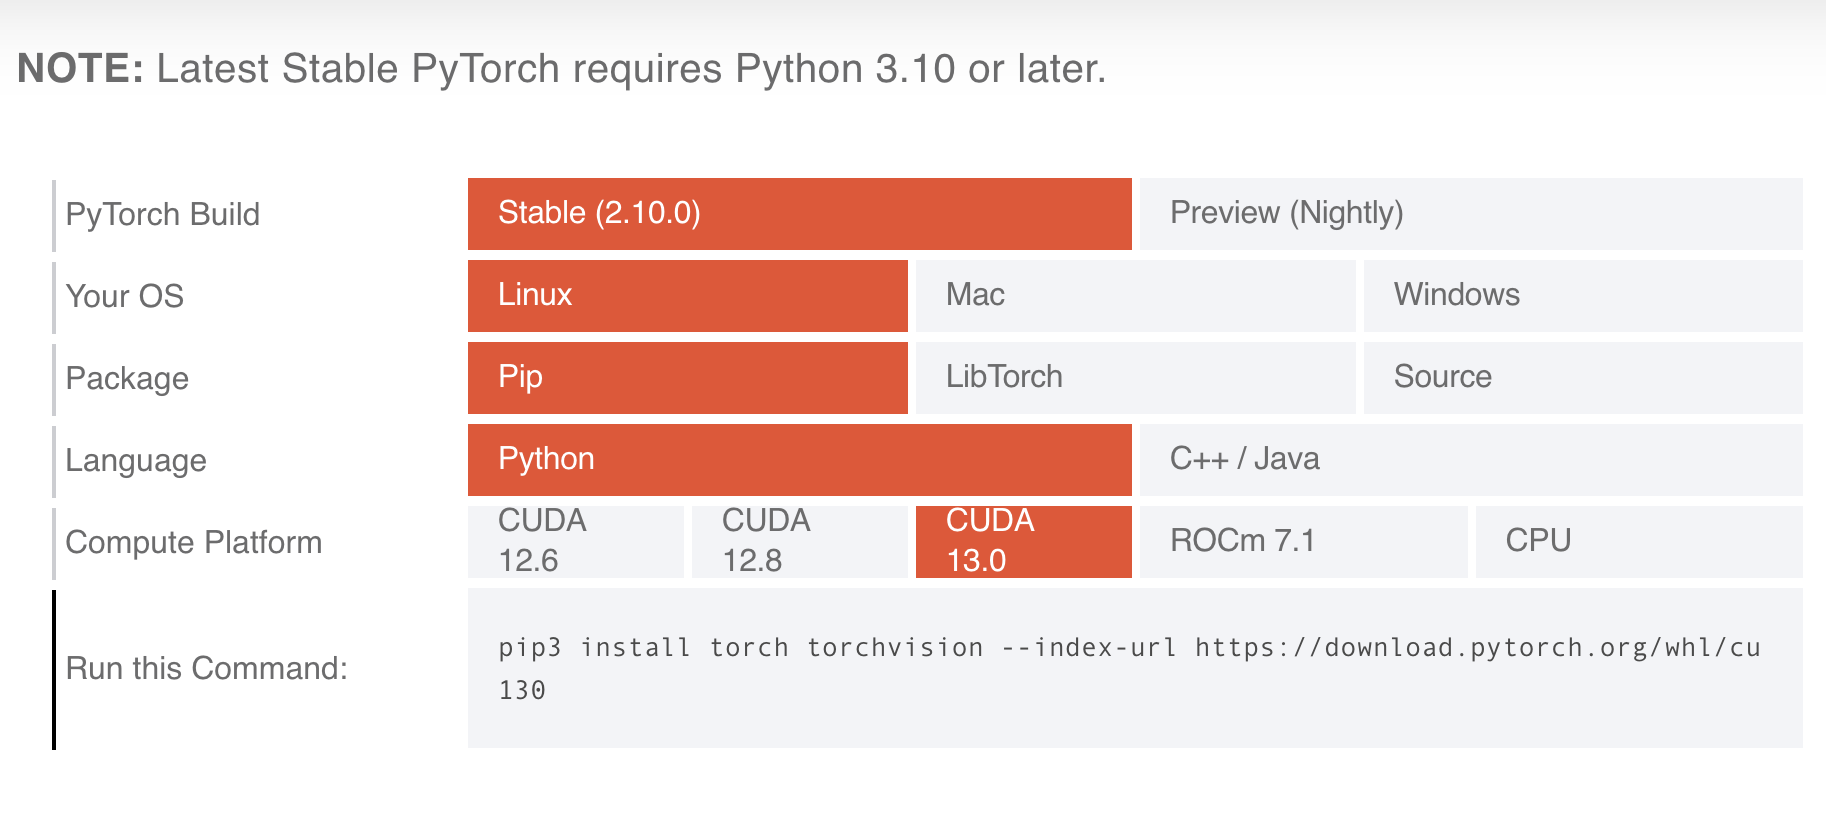 Torch Installer Example
One thing to note: if you upgrade your CUDA/ROCm, you might break some of your virtual environments. This is just a pain you'll need to live with, and also a reason to start with the latest GPU-software available. There are ways to run multiple CUDA/ROCm installs, but I haven't actually done that for my personal projects yet.
Once you get your main library installed, test it! For example, for PyTorch and CUDA, you can start a Python shell in your virtual environment and see that it runs on your GPU.
import torch
torch.cuda.is_available()
It should return True. You can also use torch.cuda.get_device_name(0) to ensure that it matches your expectations.
Then, get started installing anything else you might want for the project. Make sure that the version of your main library does not change by specifying which version you want to keep as an additional installation requirement (i.e. install YOUR_MAIN_LIBRARY==VERSION new_library) or by keeping an eye on any libraries that get changed with installation.
Run your first ML/AI job!
At this point, you're ready to test out your setup for running a workflow. Train your first model, fine-tune something, or serve a model that you want to use. Check that when it loads, it says you are using your GPU. If not, restart at the top and verify each step (i.e. drivers are working, GPU-software is working, library is working, workflow test).
Enjoy! For more videos on how to run things on your setup, check out the Probably Private YouTube.
If this post helped you, consider subscribing to my newsletter or my YouTube and sharing my work! I also offer advisory and workshops on topics like security and privacy in AI/ML and personal AI.